Newton's First Law of Motion with Hot Wheels
Who doesn’t love playing with Hot Wheels?? Using them to teach Newton’s first law of motion will have your kids begging for more physics!
This is the first lesson in my three part series of physics lessons, each on one of Newton’s three laws of motion.
Be sure to check out parts 2 & 3 too! You can find them here: Bowling Lab (2nd law) and Mars Lander Lab (3rd law).
I hope these lessons will help make physics FUN for kids and teachers!
Lesson Description
Summary: Students learn about motion by racing toy cars. Students compete for the fastest, slowest, and farthest distance cars as they explore variables such as mass, friction, drag, etc.
Learning Objective: Students will investigate the forces that affect motion by racing toy cars.
Time Required: Flexible, but I usually use two 70-minute class periods.
Materials Needed:
- Toy cars (1:64 die cast cars like Hot Wheels)
- Tracks – Here are a few options for different budgets:
- 1. Hot Wheels – this is a 40 foot track for about $25. Each group needs ~5 ft of track, depending on how much space you have. You can also buy this in a bundle with the cars.
- 2. My kid has this super fun double track where you can race two cars against each other, but it is more $$. This would work great if you want to just have one testing station where kids “race” after they’ve modified the cars. This track is SO fun and WAY more durable than the hot wheels ones that break pretty easily.
- 3. Yard sticks or books – if you’re wanting to try this on a budget or in a time crunch, you can go low-tech and let kids build their own ramps. Your results will be less accurate, but the kids will still come away with the right ideas.
- 4. PocketLab set – If you have time to apply for a grant or have a budget surplus, this set looks AMAZING. The cars have sensors that allow kids to collect accurate data while racing & crashing. There are different bundles running from about $1600 to $8000 depending on how fancy you want to get. (I am not an affiliate for this product, I just wish I had one!)
- Pennies (for weights)
- Tape
- Assorted paper/note cards & tape for wind sails (my students LOVE taping paper sails to their cars to explore drag)
- Sand or dirt (for creating friction on the track)
- Meter sticks and/or Rulers
- Timers
- Speed sensors – One year, a local science museum came to my class and taught a similar lesson, but they helped the kids build a sensor using simple circuitry! It was SO cool, but not something I was confident enough to handle on my own. It is a total game changer for collecting data if you can manage it!
Lesson Resources
I’m sharing with you the Cars of Motion Slides that I use to guide my class through this activity (see video preview below). Everything you need to know about the activity is in those slides!
Feel free to edit the slides to your needs and share with your team teachers. I just ask that you respect the copyright. Thank you!
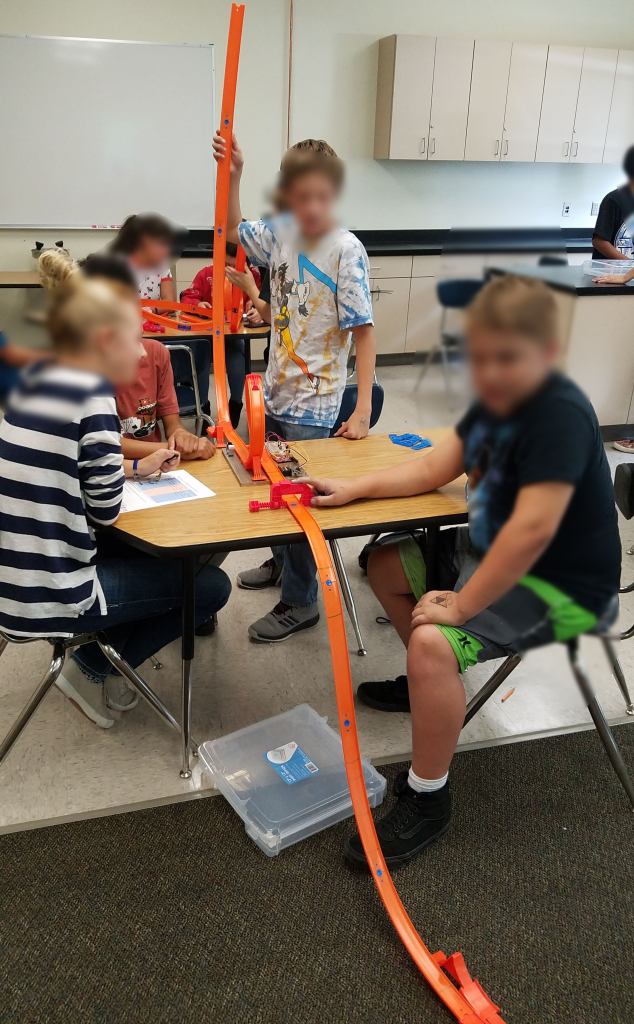
Racing with Newton's First Law of Motion
After students build their track and choose their race cars, the rest of the lesson is divided into 3 different races, each with a different objective for the winner.
Race #1 – Fastest Car
The winner of the first race is the team who designs the fastest car. I like to let students choose one variable to test as a team, and then as a whole class we put their results together to create the “ultimate” fastest car.
For example, one team might test between different models of cars, while another tapes pennies to a car to find the optimum weight. Another team could experiment with the ideal slope and/or length of the ramp.
After testing is completed, each class creates their ideal “fastest car” and then we race them against other class periods. Adding the class competition makes this SO FUN!
Race #2 – Farthest Distance
Students choose one variable to explore such as ramp height, angle, length.
Race #3 – Slowest Car
My favorite race! Students experiment with drag and friction by taping paper sails to their cars.
I’ve also had students try putting sand or dirt on the track, or even painters tape with the sticky side up (the only rule is the car has to make it across the finish line before it stops).
Grading Labs the EASY Way
A word about GRADING
I am a teacher who gets very overwhelmed by grading (does anyone not??) so I like to simplify.
Students record their data for this experiment in a Google Sheet, but I mainly just grade them on the exit ticket. It’s a simple Google Form where they complete the following 4 sentences using “science terms” from the word bank. I give a few points for each keyword used well in their sentences.
Here is an example of what this often looks like:
“An object STOPS moving when… another force stops it.” (2 pts)
“An object STARTS moving when… it’s pushed.” (2 pts)
“An object KEEPS moving when… the extra weight makes it move faster so it can go farther” (2 pts each= 6 pts)
Total score: 10/10
More Ideas for Teaching Laws of Motion
How do you teach Newton’s Laws?
I would LOVE to hear your feedback for this lesson! How did it go? What other fun activities are you using to teach the second law of motion? Please share in the comments!
And be sure to check out Newton’s Laws Part 2 and Newton’s Laws Part 3 if you missed it!
For more hands-on science activities, check out my science lesson library here.